Read before this
Read these direct prerequisites in order. Each guide lists any earlier context it assumes.
When to use technical animation
Use this guide when your viewer needs to understand how parts work together. For example, a teacher has a reference about turbojet engines and wants a short, narrated cutaway that connects the compressor, burner, turbine, shaft and nozzle. Machine anatomy is the Studio style for this kind of illustrated technical explanation.
You can also describe how components fit together in an assembly sequence, or how a larger system such as a dam works. State the audience and the relationship or sequence you want viewers to understand. Provide the relevant product instructions when the explanation must follow a particular design.
For a tutorial showing where to click in software, use your screen recording or Browser Handoff. For measured geometry, fit or performance, keep the engineering model or calculation as the source; this guide produces an explanatory video.
Create a walkthrough from real product screens
Before you start
Sign in to ngram and check that Opus 5.5 is available in Model. You need generation credits; review the estimate shown for your settings. Free accounts have a monthly premium-model allowance, and paid plans are required for MP4 downloads. The model selector and download dialog show the choices available to your account.
Prepare the concept, audience and parts or stages to show. A reference is optional when you can describe the topic directly. Add an approved diagram, manual, PDF or public source URL when the video needs specific terminology, dimensions or product steps. Tell ngram which source controls those facts.
Step 1. Write the explanation in Video brief
Open ngram, choose Home, then Prompt to video. Enter what the audience should understand in Video brief. Name the parts, explain their relationships and state the order to show them. Add a public reference URL to the brief or use Add files for supporting material.
The finished turbojet example below was created with this brief. Replace its topic, source and teaching goal when making your own video:
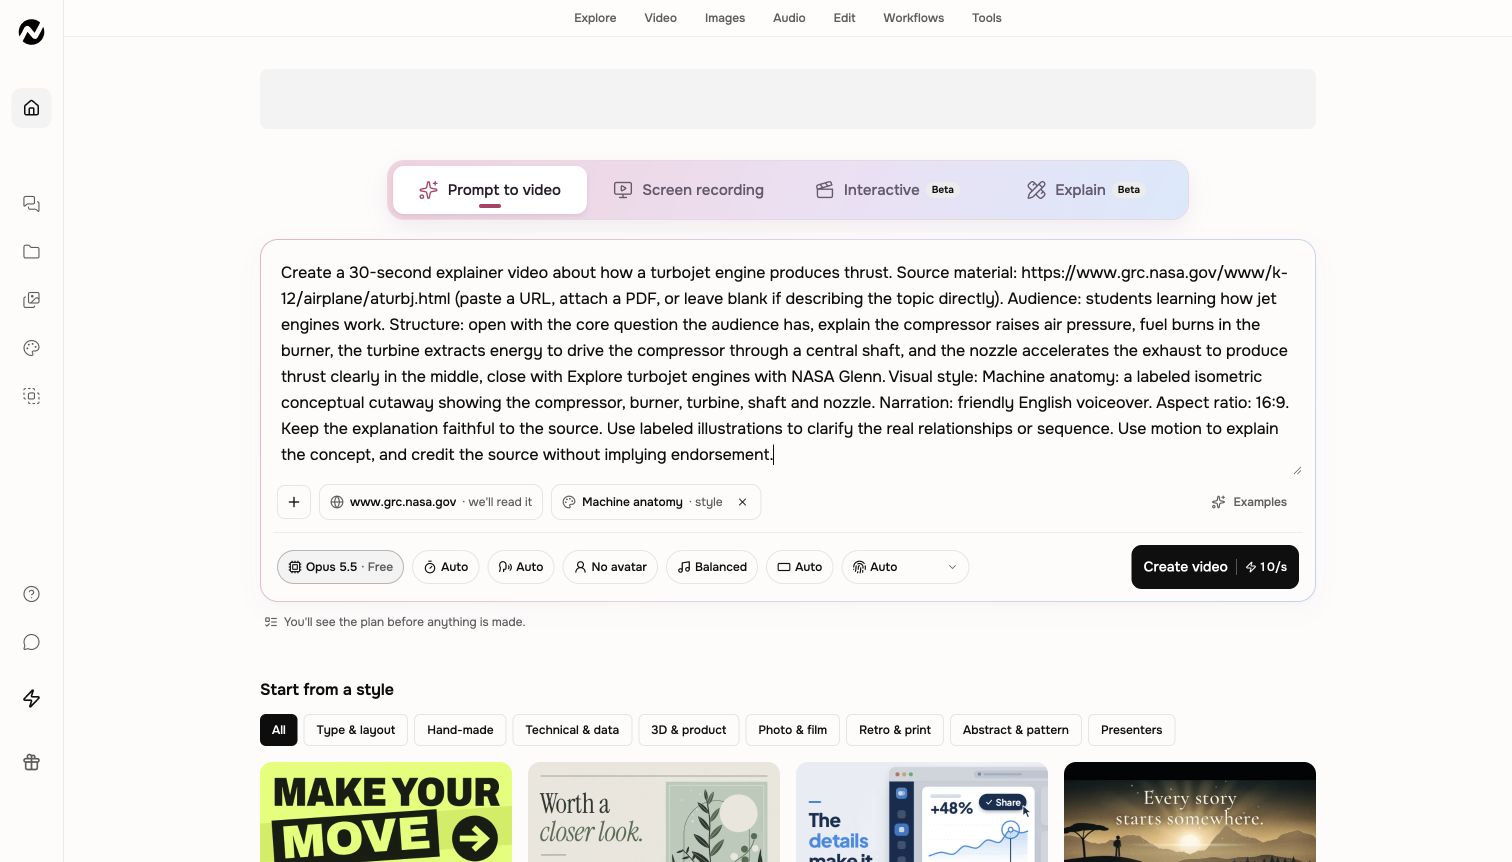
Create a 30-second explainer video about how a turbojet engine produces thrust. Source material: https://www.grc.nasa.gov/www/k-12/airplane/aturbj.html (paste a URL, attach a PDF, or leave blank if describing the topic directly). Audience: students learning how jet engines work. Structure: open with the core question the audience has, explain the compressor raises air pressure, fuel burns in the burner, the turbine extracts energy to drive the compressor through a central shaft, and the nozzle accelerates the exhaust to produce thrust clearly in the middle, close with Explore turbojet engines with NASA Glenn. Visual style: Machine anatomy: a labeled isometric conceptual cutaway showing the compressor, burner, turbine, shaft and nozzle. Narration: friendly English voiceover. Aspect ratio: 16:9. Keep the explanation faithful to the source. Use labeled illustrations to clarify the real relationships or sequence. Use motion to explain the concept, and credit the source without implying endorsement.
Step 2. Select Machine anatomy
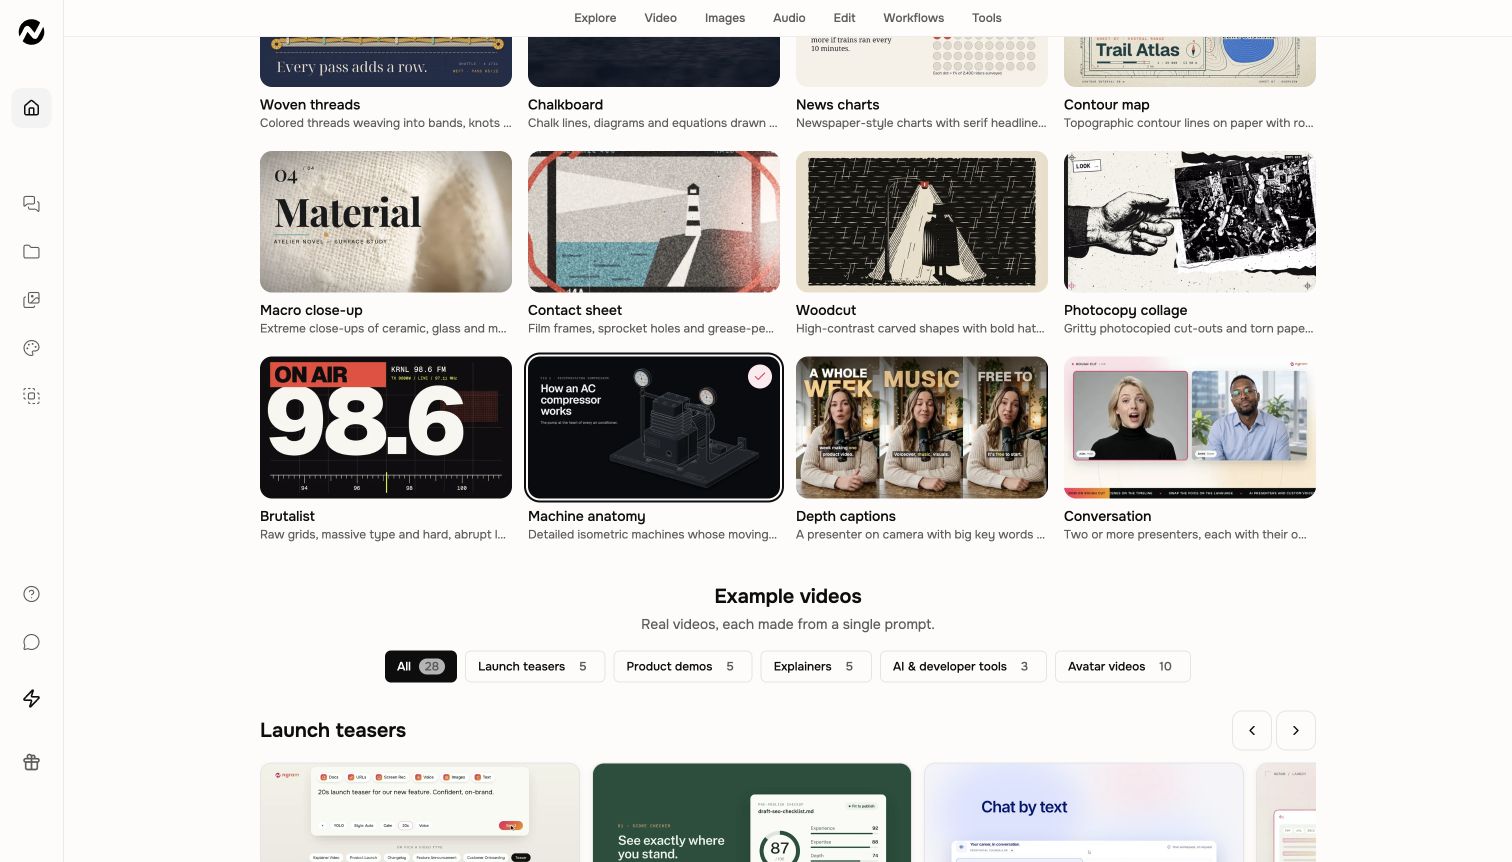
Under Video brief, find Start from a style. In the All gallery, scroll to Machine anatomy, beside Brutalist and Depth captions. Select the card. It gains a check mark, and Machine anatomy appears beside the brief as the selected style.
Step 3. Check Model, Voice and Presenter
Return to Your video setup beside the brief. Set Model to Opus 5.5 for Machine anatomy. For narration over the technical illustration, start with Voice on Auto and Presenter on No avatar. These are recommended starting choices: selecting the style does not clear a presenter you previously selected. Open Presenter and choose No avatar if you want the mechanism to fill the video.
Review Length and Format, or state your target duration and aspect ratio in the brief. The example requests about 30 seconds in 16:9. Check the credit estimate before choosing Create video.
Step 4. Choose Create video and wait for the plan
Choose Create video. Your project opens with chat on the left and Preview on the right. ngram reads the brief and sources, then prepares a plan containing the script and visual direction. Wait for the plan to ask for your review. Keep this project open rather than submitting the same brief again while it is being prepared.
Step 5. Review the parts and approve the plan
Read Script and Production details in the proposed plan. Check what the audience will hear as well as what each scene will show. For the turbojet example, check the path from compressor to burner, turbine and shaft, then nozzle and thrust.
- Compare every named part, label and factual statement with your source. Check that the visual shows the right connection, movement or flow.
- Check the sequence, narration, duration and source credit. For an assembly explanation, verify the component order and the point where each part joins the next.
- Choose Request changes if the explanation needs a correction. Review the revised plan, then choose Approve plan when it is ready for production.
After production, choose View plan above Preview to revisit the saved direction. The plan records the intended explanation; review the finished motion as well.
Step 6. Watch and check the finished animation
Follow production in chat. When the video is ready, play the complete preview. Check that labels stay readable, moving parts remain connected and the narration matches what is visible. Confirm the sequence against your source before sharing it.
This existing example is 31 seconds long. It begins with the question, then shows the compressor, burner, turbine and shaft, nozzle and thrust, and a closing source credit. Its final length allows the narration to finish.
Read the NASA Glenn turbojet reference used in the example
If one part is wrong, request a focused change in the same project. For example: “In the turbine scene, make the shaft visibly connect the turbine to the compressor. Keep the approved narration and other scenes.” Review the estimate before generating a revision, then replay the affected scene and its transitions.
Step 7. Download or share the result
On a paid plan, open Download and export in the Preview toolbar, choose Download, select an available resolution and choose Download video. Wait while the MP4 is prepared, then play the saved file to check the picture, sound and final frame. Public watch links and embeds are available on every plan, including Free.
Download and export a completed video
What a successful result looks like
The viewer can identify the important parts, follow the movement or sequence and explain the intended relationship. The labels and narration agree with your reference, and the saved video contains the same explanation you reviewed. Your project remains available in Projects for later revisions.
If Machine anatomy or Opus 5.5 is unavailable
Check the options and any availability message in Model. Return to Start from a style and confirm that Machine anatomy is selected. A style card being visible does not establish that another model will use the same technical-animation workflow. If Opus 5.5 remains unavailable, contact Support with the visible message and project URL.
If the plan waits or the result misses a part
Read the latest chat message. A plan awaiting approval needs Approve plan or Request changes before production continues. If the finished illustration has the wrong part, label or order, name that scene and the source detail to correct in the existing project. Avoid creating a second video just to recover a single scene.
If the preview stays blank or a download is still preparing
Reopen the same completed project and try playback again. On a paid plan, check the completed MP4 through Download and export as well. If preparation fails or the saved file does not play, contact Support with the project URL and last visible state. Keep the original project while you resolve playback.
Adapt the brief for an assembly or classroom lesson
For assembly, identify the starting components, the order they join and the finished state. For a classroom explanation, define the learner’s level and one question the animation should answer. Use the same setup, review the proposed sequence and check the resulting motion. For an existing video that only needs a factual update, revise its project instead of starting again.
Questions about technical animation
Keep going
Compare visual treatments and select one in Studio.
Adapt a brief for the outcome your audience needs.
Check the script and planned scene sequence before production.
Request a focused change to an existing explanation.
Save the video at a resolution available on your plan.